Lets have another look at this circuit -
In the following video I have replaced the 4 AA batteries that are powering the servos with a single 9 volt PP3 Battery. This battery is providing power to the servos and two LEDs through a 7805 regulator. This is a common regulator used in many Arduino's such as the Boarduino and standalone Arduinos. It is a reasonable replica of the 9V PP3 battery and on board regulator powering my Arduino UNO in the first video.
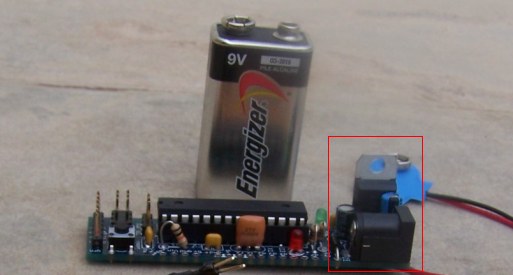
PP3 9 Volt Battery and The 7805 Regulator (red highlight) That Power A Boarduino
I have made one change to the circuit and introduced two series LEDs (and a current limiting resistor). Like all LEDs these two require a minimum voltage to light, in this case, combined they require around 4.5 volts. Thats about the minimum operating voltage of an Arduino so lets imagine that the LEDs are infact an Arduino sharing the same power circuit as the Servos.
Now lets see what happens under load -
Servo Under Static Load
When the LEDs go out, it is because the are no longer getting their minimum 4.5 volts.
When we apply a load to the servo, it draws more current, in this case it draws more current than the battery is able to deliver, when this happens, the battery voltage drops.
If this really was your Arduino it would have 'browned out' or at the very least your project would begin to behave oddly.
In the following video the servo is being instructed to sweep, even less effort is required to get the servo to take our imaginary Arduino out of service -
Loading Servos In Motion
Something else interesting is also happening, its easier to see in the following videos, but even without a load applied the servo is able to take down the LED Arduino -
In this circuit I have added another LED in the top left corner for comparison, this LED is driven by the Arduino power circuit (+5v -> 680 Omh resistor -> GND). The other two LEDs remain on the servo power circuit, note how the Arduino LED remains at a constant brightness whereas the imaginary Arduino LEDs flash noticeably -
Three Servos Overloading The Power Circuit
The camera is not fast enough to capture the full extent of the flashing in the LEDs, but if we can see it at all , you can be sure the Arduino is feeling it.
So what is this noise, where is it coming from and what can we do about it ?
Its not really noise, its our battery telling us that it just can't deliver the current we are asking for. The video is produced with no load, applying even a light load takes the LEDs out completely - thats not noise, thats your circuit telling you something.
The flashing is in sync with the servos changing direction at the end of their sweep. I don't have the means to investigate this further but suspect its down to the following effects -
1) The servos internal motor driver will be switching one set of transistors off and another on in order to reverse the motor
2) Momentum, the servo has to stop its internal motor and gears and get them moving in the opposite direction, this will require a burst of power.
Ok, but how do we get rid of the noise ?
As its not really noise, just our circuits way of telling us it doesn't have enough power, the solution is to add power.
Repeating the tests with the original four AA Battery pack provided improved results however it was not until I powered the circuit with a high power LIPO battery that the LEDs would remain lit at a constant brightness.
More on LIPOs and other batteries in a future post and some suggestions on using a similar LED set up to 'let the hardware do the work' in monitoring the power situation.
Duane B
No comments:
Post a Comment