Please note, that your XBee shield may require you to perform extra steps, so please do further reading before jumping in head first. I am not an expert, so don't blame me if you fry your board.
The following set of steps worked for me:
Step 1: Download and Install X-CTU
The easiest way to setup your XBee module is via the X-CTU software from Digi. It can be downloaded from their site here: http://www.digi.com/support/productdetail?pid=3257
- Select the Diagnostics, Utilities and MIBs section
- Download and install the XCTU 32-bit ver 5.2.7.5 installer (do a virus check after download)
- Please note that this is for Windows platforms only !
- FYI: We will run the software later
Step 2: Upload the bare-minimum script on your Arduino controller
I perform this step to prevent any previous projects from interfering. This may not be necessary, but I tend to do this before wiring up any of my new projects. This is the script I load onto the Arduino:
Bare Minimum Arduino Sketch:
1 | void setup() { |
Step 3: Connect the Shield to Arduino, and XBee to Shield.
- Disconnect the Arduino UNO from the computer.
- Insert the XBee module into the Shield.
This is the XBee Shield and XBee module side by side
- The pins from the XBee module should slot into the respective headers on the Shield.
This is the XBee module on the XBee Shield
- Connect the XBee shield to the Arduino

- The pins from the XBee shield should slot into the respective headers on the Arduino board.
- Move the little white switch in the corner to USB.
- There are 2 options - USB mode and XBee mode.
- We want USB mode which will allow the computer to communicate with the XBee module
Step 4: Connect Arduino to computer, and run the X-CTU Software
- With the XBee module and Shield connected to the Arduino, and the Shield's white switch in USB mode; connect the Arduino to the computer using a USB cable.
- This Arduino board appears as COM7 on my computer.
- Here is what the X-CTU software looks like when it loads up
- Press the Test / Query button to see if the computer can talk to the XBee module.
- If successful, you should see something like this:
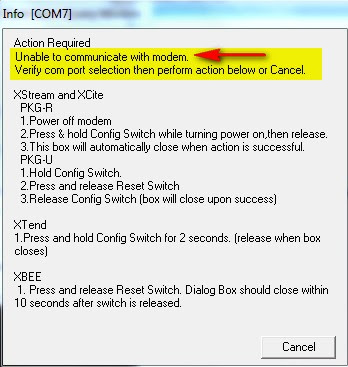
- If you accidentally leave the XBee shield in XBee mode, or if your computer fails to communicate with the XBee module, you may encounter these screens.
If you get a successful Test / Query, then move onto the next step.
Step 5: Read XBee Firmware settings:
We can now try to read the XBee firmware settings by
- Select the Read button to read the XBee firmware settings
Step 6: Download older version of firmware if necessary
- I tried downloading new versions, but this did not seem to work, as the computer could not detect any newer updates available. The problem I had, was that I needed an "older version" of firmware to communicate with the XBee module in order to read/write new settings to it.
- I could not select the firmware version from the drop down boxes, which indicated that this particular firmware version was not installed on my computer. So here is what I did.
- I went back to the Digi site and selected the Firmware update section.
- This provided a link to an FTP site with "previous versions" of firmware.
- Here is a link to the FTP site: ftp://ftp1.digi.com/support/firmware/update/xbee/
- In the X-CTU software, in the Modem Configurations tab, select the "Download new versions button", and select File. Navigate to the zip-file just downloaded and select it.
- The software should tell you that it has updated successfully or something to that effect.
- The modem type and version should now be an available option in the drop down boxes, however, we will continue where we left off (in step 5) and try an read the firmware settings from the XBee module, by pressing the Read button in the Modem Configurations tab on the X-CTU software.
- It should look something like this:


No comments:
Post a Comment