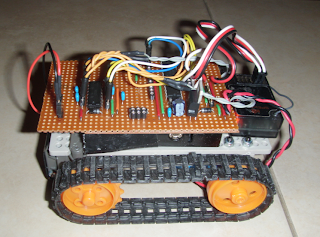
A low cost remote controlled robot using a standalone Arduino to interface between a pistol grip RC Transmitter/Receiver and an L293DNE H-Bridge Motor driver. The project provides three mapping/mixing modes between the pistol grip transmitters channels and the forwards and reverse operation of the robot tracks. The mapping mode is dependent on the throttle input as follows -
The Arduino provides three steering modes depending on the level of throttle input. The modes listed below are shown in the order of throttle input (low to high) and the order in which they appear in the video.
Mode 1 - Opposition
When the throttle is near the idle point, the tracks will operate in opposition to turn the robot on the spot.
Mode 2 - Braking
At low speed the robot turns by locking the inside track and pivoting around it.
Mode 3 - Proportional Control
At higher speeds the robot has full proportional control allowing for fine control over the steering at speed.
All modes are available in forwards and reverse, speed of rotation and forwards/reverse motion is also proportional in all modes.
The chassis consists of components from the the following Tamiya parts sets -
Double Independent Gearbox - 70168
http://www.etamiya.com/shop/tamiya-70168-tamiya-double-gear-leftriight-independent-speed-p-6477.html
Track and Wheel Set - 70100
http://www.etamiya.com/shop/tamiya-70100-tamiya-track-wheel-p-5767.html
Universal Plate Set - 70157
http://www.etamiya.com/shop/tamiya-70157-tamiya-universal-plate-2pcs-p-6911.html
Chassis underside view
For anyone planning to use 70157 or similar products I strongly recommend using 3mm machine screws and nylock nuts in place of the fixing pins provided in these sets. Nylon locking nuts are widely used in RC Cars to prevent parts unscrewing when subjected to vibration.
3mm locking nuts -
http://www.rcmart.com/traxxas-2745-nylon-locking-nuts-p-32138.html?cPath=595_739_331
Prototyping Platform
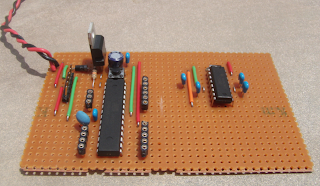
As I had not worked with an L293DNE motor driver before I wanted to build a circuit which I could use for prototyping. To do this I built a simple stripboard circuit with a standalone Arduino on the left and the L293DNE on the right.
To connect the two I soldered in several sets of headers allowing me to access the Arduino pins and the key L293DNE pins with jumper wires. While the initial result looked very promising as a prototyping platform, the end result is less appealing -
Initial Prototyping Platform | The End Result As Used In the Video |
The Robot next to the Spectrum DX3S Transmitter used to control it.
More about the transmitter here -
Power
The Standalone Arduino is powered by a PP3 9 Volt battery mounted under the chassis plate. The motors and L293DNE are powered by 4AA batteries mounted above the chassis plate and just visible under the prototyping board in the picture.
Why two sets of batteries ? See here -
The code builds on the preceding series of posts on this blog dealing with interface a micro controller to an RC Receiver. Most posts in the series have assumed that the Arduino will read the incoming RC Signals, transform them and output them as new RC Signals using the Servo library. In this case we are doing something slightly different.
The Spectrum DX3S transmitter is a pistol grip type with a trigger based throttle channel and a wheel based steering channel. These are not the most intuitive controls for a tracked vehicle having only forwards and backwards control over its two tracks. In this project, the Arduino is used to map from the transmitter input to independent instructions to the two motors to produce the desired movement.
In order to make the project a little more interesting I want to have three modes of movement 1) Turning on the spot, 2) Locking a track to pivot about it 3) Proportional power to each track for smooth steering. The mode is automatically selected based on the throttle input. At a standstill, the vehicle will operate both tracks in opposite directions to turn on the spot. At low speeds it will lock the inside track and pivot around it, at higher speeds the vehicle turns through proportionally slowing down the inside track depending on the degree of steering input.
Full code and explanation here -
Note - The final project has only modes 1) and 3), mode 2) has been removed as it provided no additional functionality, it is possible to lock the inside track for tight turns by applying full steering in mode 3.
http://rcarduino.blogspot.com/2012/05/interfacing-rc-channels-to-l293d-motor.html


No comments:
Post a Comment