Thursday, October 14, 2010

Arduino : Make or Buy ?

As Arduino target a wide range of users from hobbyist to artists to fashion designers, you have a wide range of choices. As the hardware is "open source", you can buy the board directly from Arduino in Italy or some of its clones or Arduino compatible boards near to you.

As everyone have different requirements,  you can either buy an Arduino board and its wide variety of shields (the add-on board that sits on top of Arduino boards) or make it yourself in a DIY way by buying the ingredients like ATMEL AVR chip (with Arduino bootloader), resistors, capacitors, LEDs, hook up wires, sensors and of course the breadboard.

Buying the Arduino board and the ready made shields have its advantage as you can just focus on what you are trying to achieve, programming the board, making a data logger, controlling robots, expensive thermometers without worrying about soldering, electronic components, and parts with different voltages and connectors. Buying it would be more expensive but you do not need to worry about parts not working as most of the shields are usually tested and have the library to support it.
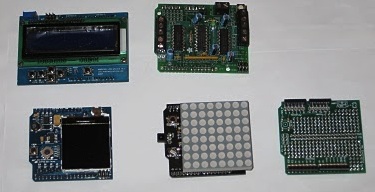

Some of the more interesting Arduino shields like LCD shields, motor shields, colour LCD shields, LED Matrix shields and proto shields. The proto shields are blank board that you can make your own shields
by soldering electronics parts and sensors on top of it.

The second option is to make your own parts, for example I made a LCD module by buying the LCD module, solder 16 header pins, hook it up with some jumper cables to monitor the light from a Light Dependent Resistor(LDR). Well, the function is the same but it looks a little bit messy.

Arduino with LDR and 2x16 LCD module


After trying out a few other sensors like LM35 temp sensors and LDR , I went a step further and ordered an ATMEGA 328 chip (with Arduino bootloader)  and make my own Arduino on a breadboard for a fraction of the price of the Arduino board. I did my research from scratch on what to do, what parts to buy, from the voltage regulator, the ATMEGA 328 pinouts to decoupling capacitors.

Arduino on breadboard with MAX232

This is the finished Arduino on a breadboard, the total cost is only a fraction of an Arduino board. I have an existing  USB-Serial adaptor and breadboard, so it would cost much less for me. The only thing I need to solder was the DB9, RS-232 female connector to connect to the MAX232 serial chip. The setup is very similar to older Arduino serial board like the Freeduino Serial below.

Serial Freeduino


Update : I've rearranged the MAX32 chip to be nearer to the ATMEGA 328 Rx/Tx pins and added a 2x16 LCD Module with some extra space on the breadboard for adding in sensors and speakers.
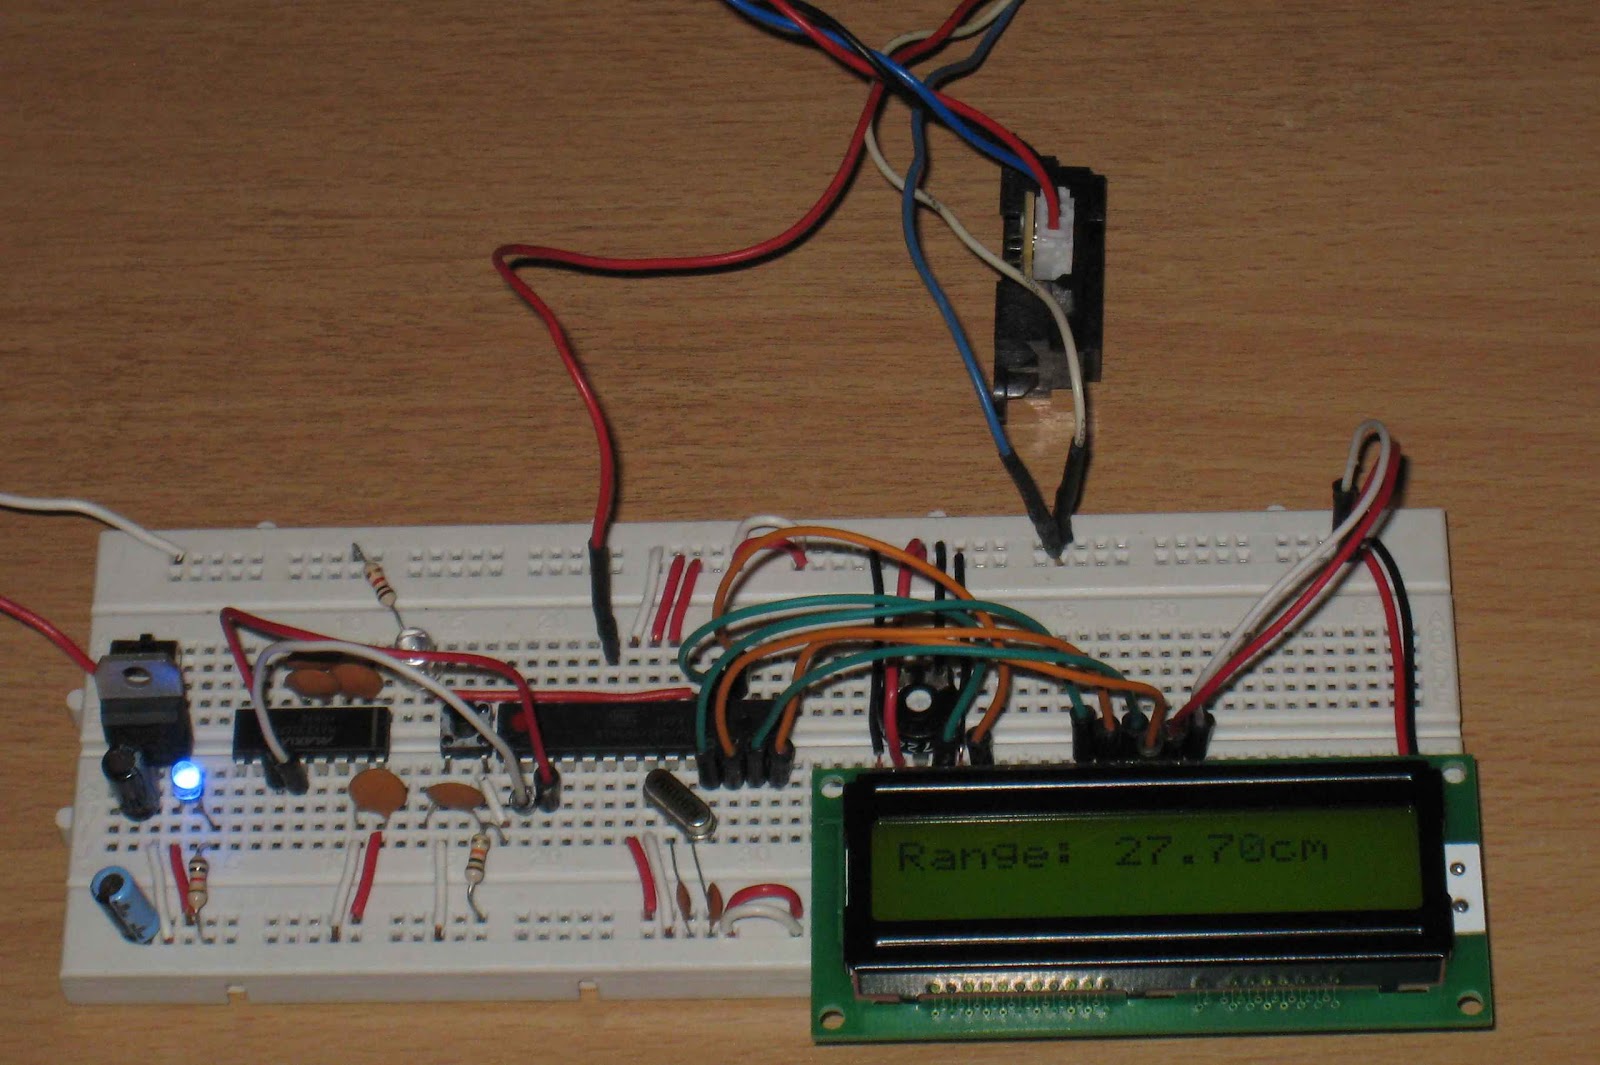
Arduino on breadboard with Sharp IR sensors and LCD module

For the breadboard above, I have a Sharp GP2D12 ( 10cm - 80cm) IR range sensors with a sketch to display the distance of the sensors and trigger an siren via the speaker when a predetermine range is reached. This is a standalone application without the PC or the USB port. It takes power from 7.5V to 12V power adapter.

Comparing to the first picture with Arduino Duemilanove, breadboard and LCD module, my breadboard version look so much neater with less jumper cables crossing over to each other. Besides the Atmel ATMEGA 328 chip with Arduino bootloader, all the other parts are easily found in Kuala Lumpur, Malaysia.

Tuesday, October 12, 2010

Arduino - Open source hardware

When we mentioned open source, most people will think of software like GNU/Linux, those free and open software where you have access to the source codes and you can make changes to the codes to suit your needs if you have the knowhow.

When we mentioned microcontroller (MCU in short) to non-engineers, most people will think of those chips and electronics inside a modern car that controls the air intake, fuel mixtures and other parts of the car or the chip in the washing machine that control the washing cycle. It is the intelligence that make the electronic appliance works and repeats over and over again with limited options or customisation. This is the hardware part I am taking about.


Arduino founders Massimo Banzi and David Cuartielles spend time and money to designed the board, make the actual hardware and sell it for a small profit. What they did different is that they published everything for everyone to take, the design files, schematics, software for the board. Anyone can built the hardware at the lowest cost, sell it and keep all the profits without needing to pay the founders any royalties. In an article from Wired magazine "Build It. Share It. Profit, Can Open Source Hardware work"  Banzi quoted "If you publish all your files, in one sense, you are inviting the competitors to come and kill you".

Enough of definition and history. One of the first questions a beginner will ask, what can I do or use Arduino for ? Is it easy to learn how to program and use ? How much does it costs ? I do not know electronics, will I be able to pickup all the necessary skills to make it work ? Where can I buy parts for my projects ? This is where this blog, Arduino for beginners will be different and will talk more about sensors and their usage instead of just howto and tutorials on projects.

Let me address them one by one... What can you use an Arduino for ? Well, you can use it to interface with the physical world. The most basic would be to control LEDs (not very useful with a single LED, just make it blink at different timing) but when you combined it with sensors and creative ideas, you can create lots of fun stuff  like mood lamp using a 3 colour LED, scrolling LEDs, distance finder, motion sensors, home made alarms, custom remote controllers and one of the most popular, make robot more intelligent with sensors, servos and logics.

Machine or computer interface with human using sensors and everything we use today have many sensors in them. I'm not talking about temperature sensors in the aircon but most basic stuff like the keyboard I am typing this blog, it is a combination of many buttons sensors, mouse, an IR sensors. Apple macbook have tons of sensors (to make it more cool and intelligent) besides the keyboard, touchpad is a touch sensors, light sensors to dim the screen in dark room, proximity sensors to off the display when you close the lid, IR sensors to take input from the remote controller. With the iphone, they have sensors like accelerometers, touch screen, proximity and light sensors. Well you get the idea.

Arduino with its input and output pins, can be program to either read sensors using digital pins (on or off) / analog pins (voltage differences) or send an output to the output device like a LED, speakers, USB/serial port to the computer, LCD screen or turn on/off an electrical appliance using relays.

Please refer to Arduino Playground for more details like interfacing with hardware, software and other related information.

Wednesday, October 6, 2010

The breadboard


Anyone going into electronics will definitely need this : a breadboard. This is a historical name that stick till today because during the early days, they used to nail copper wires to a wooden board that used to cut ... well you would have guessed it... bread. Today, they are also called solderless breadboard or plugboard. ( source : wikipedia.com )

The top and bottom two horizontal rolls (connected together inside the breadboard) are for power supply ( + and - ) and the two five rolls in between are connected vertically inside the breadboard. The groove in the middle is designed so that an integrated circuit (chips) with long legs on both sides can be plugged in between the groove. These are called DIP ( Dual In-line Package ) chips.